
Does your back hurt from bending over to buck firewood on the ground? Can you admit that occasionally you cut too far and run your newly filed chain into the dirt? Do you spend too long bucking pole-sized firewood or sawmill slabs for sugaring wood? If so, it’s time to put down your chainsaw and pick up a cordless drill. In less than an hour, and for about the cost of a new chainsaw chain, you can build a sawbuck that will save time, money, and your back.
Historically, sawbucks were V-shaped and used to hold firewood at the appropriate height while bucking with a crosscut saw or bow saw. With the advent of chainsaws, sawyers figured that they could speed up the process by cutting multiple pieces at once, which they accomplished by making a deeper V or using a square crib arrangement. However, the one challenge of working with such a design is that as you cut, the weight of the severed wood on top pushes down and pinches your chainsaw bar as you work through the stack.
One solution to this is the inverted-V or tent-style sawbuck, where pieces fall to the center instead of resting on the chainsaw bar as you cut. The tent-style sawbuck can be either one- or two-sided and works equally well with both poles and slabs. Here’s how to make one:
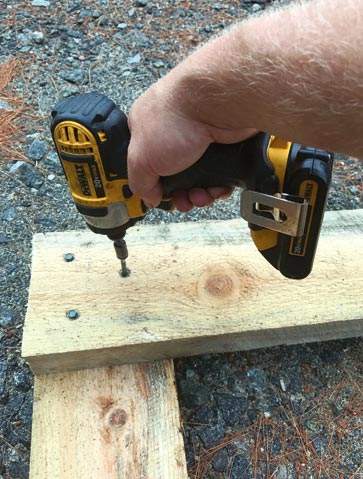
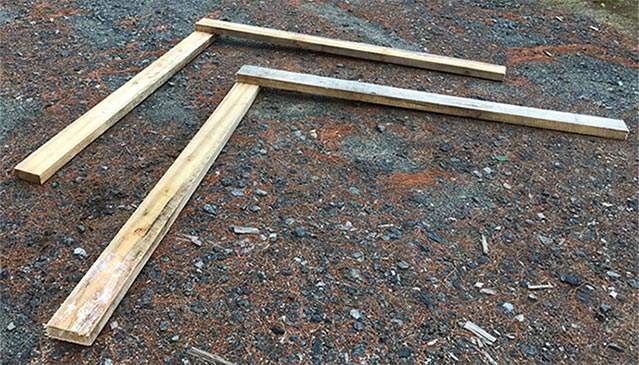
Step One (Image 1) We opted to build our sawbuck out of rough-cut 2x6 lumber. The lumber dimensions can be scaled up or down based on your application. Start with two seven-foot-long boards and use three and a half-inch lag screws to attach them at a 90-degree angle. (Image 2) Repeat so that you now have a matched pair of sawbuck ends.
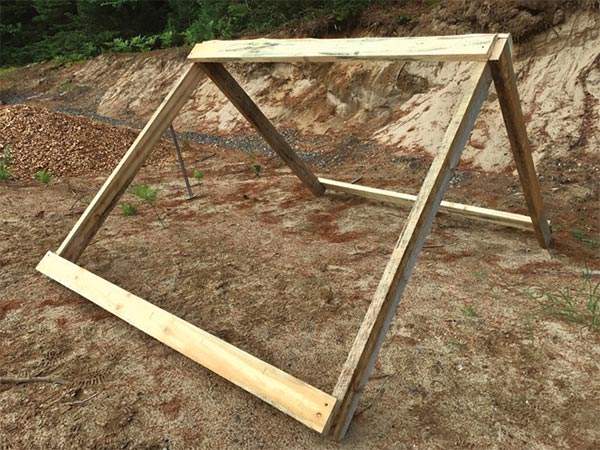
Step Two (Image 3) With a helper, stand up each end and attach horizontal stringers at both the top and bottom on each side. The length of these stringers should be divisible by the length of firewood you wish to cut. The overall length should also reflect the approximate length of material that you’ll most frequently cut. In this case, our stringers were eight feet long. (Hint: if you don’t want to bend over too far, consider raising the bottom stringer to match a work height that’s comfortable for you.)
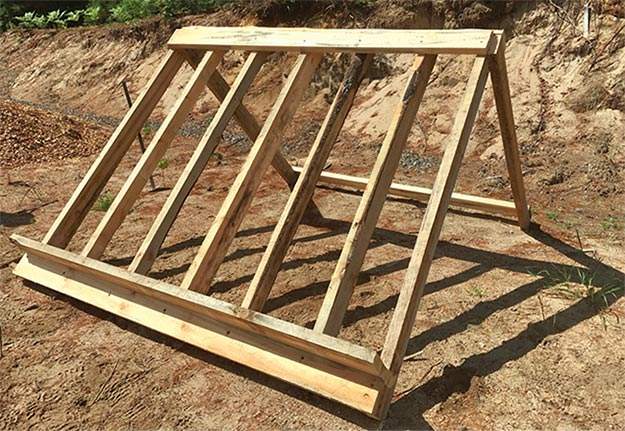
Step Three (Image 4) Screw 2x6-inch vertical markers equidistant at the desired cutting interval. In this case we opted for 16-inch spacing. Screw a 2x8-inch baseboard perpendicular to your bottom stringer to create a rest for the bottom log/slab.
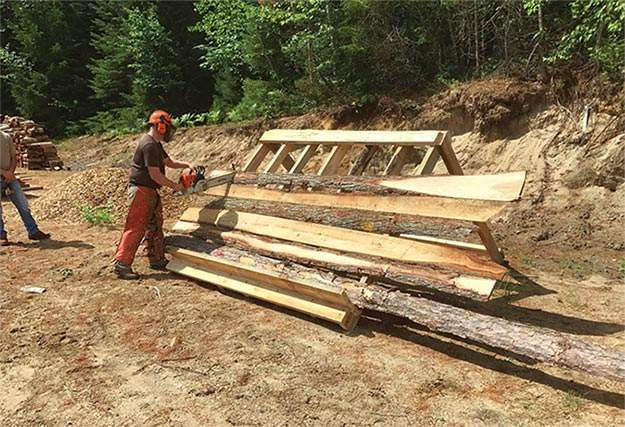
Step Four (Image 5) Stack your slabs or pole wood on the sawbuck and begin cutting. As you make each pass, the firewood will fall into the open space below instead of pinching your bar. Long pieces may need to be adjusted after taking a few cuts.